Astrophotography
Recording My View
(Update: I've started to put some images here.)
Until recently, I hadn't done a lot of astrophotography. I occasionally pointed a digital camera, handheld, into the eyepiece. This is afocal photography, since the camera is just taking a picture of the (virtual) image formed by the eyepiece, the same image you see with your eye. The fancier kind of photography, called direct projection or prime focus, involves attaching the camera back directly to the telescope, using the telescope like a very large telephoto lens. (Many of the largest telephoto lenses, the kind you see at sporting events, are in fact small catadioptric telescopes.)
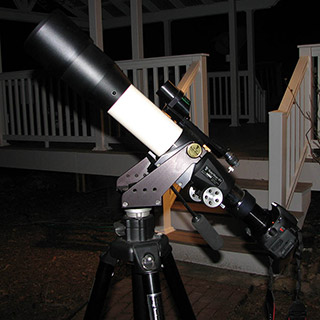 Televue TV-85 refractor with Canon
T3i camera attached.
Televue TV-85 refractor with Canon
T3i camera attached.
In January of 2013, I got a real camera and the adapters I need to attach it to my refractor, and I'm pretty excited about it! The camera is a Canon EOS Rebel T3i (also known as the 600D). This is at the low end of the Canon DSLR line, but a big step up from point-and-shoots and cellphones. The picture shows the camera attached to the telescope in my back yard, on the second night I took them out together.
To attach a DSLR to a telescope, you need a T-ring specifically designed for the camera. It attaches to the camera the same way the camera's lenses do. You also need a T-adapter, a tube that threads onto the T-ring at one end and slides into the telescope focuser at the other. Ideally, the T-adapter is designed for the telescope, since the tube needs to position the camera far enough back to reach focus. I got my T-ring from Vixen and the adapter from TeleVue.
Without some additional equipment, this setup will really only work for the Moon and the (filtered!) Sun. Everything else is either too small or too dim. But that's fine with me. These two objects are a great place to start. On my second night out, Jupiter happened to be in the same field of view, less than a degree away from the Moon.
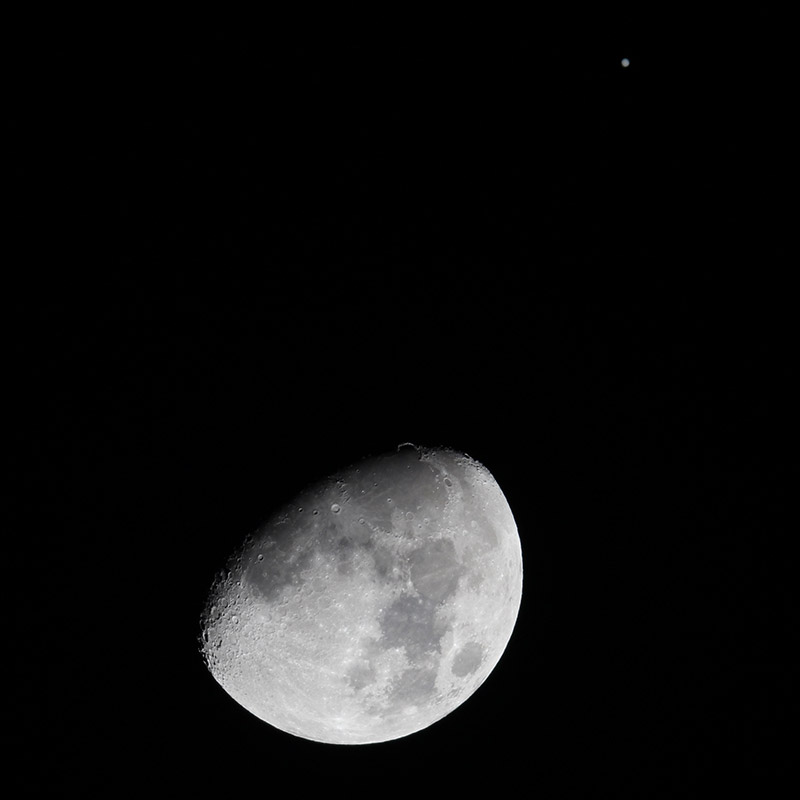 Moon
and Jupiter. January 21, 2013 10:15 p.m. EST. 1/250 sec, ISO 200.
Moon
and Jupiter. January 21, 2013 10:15 p.m. EST. 1/250 sec, ISO 200.
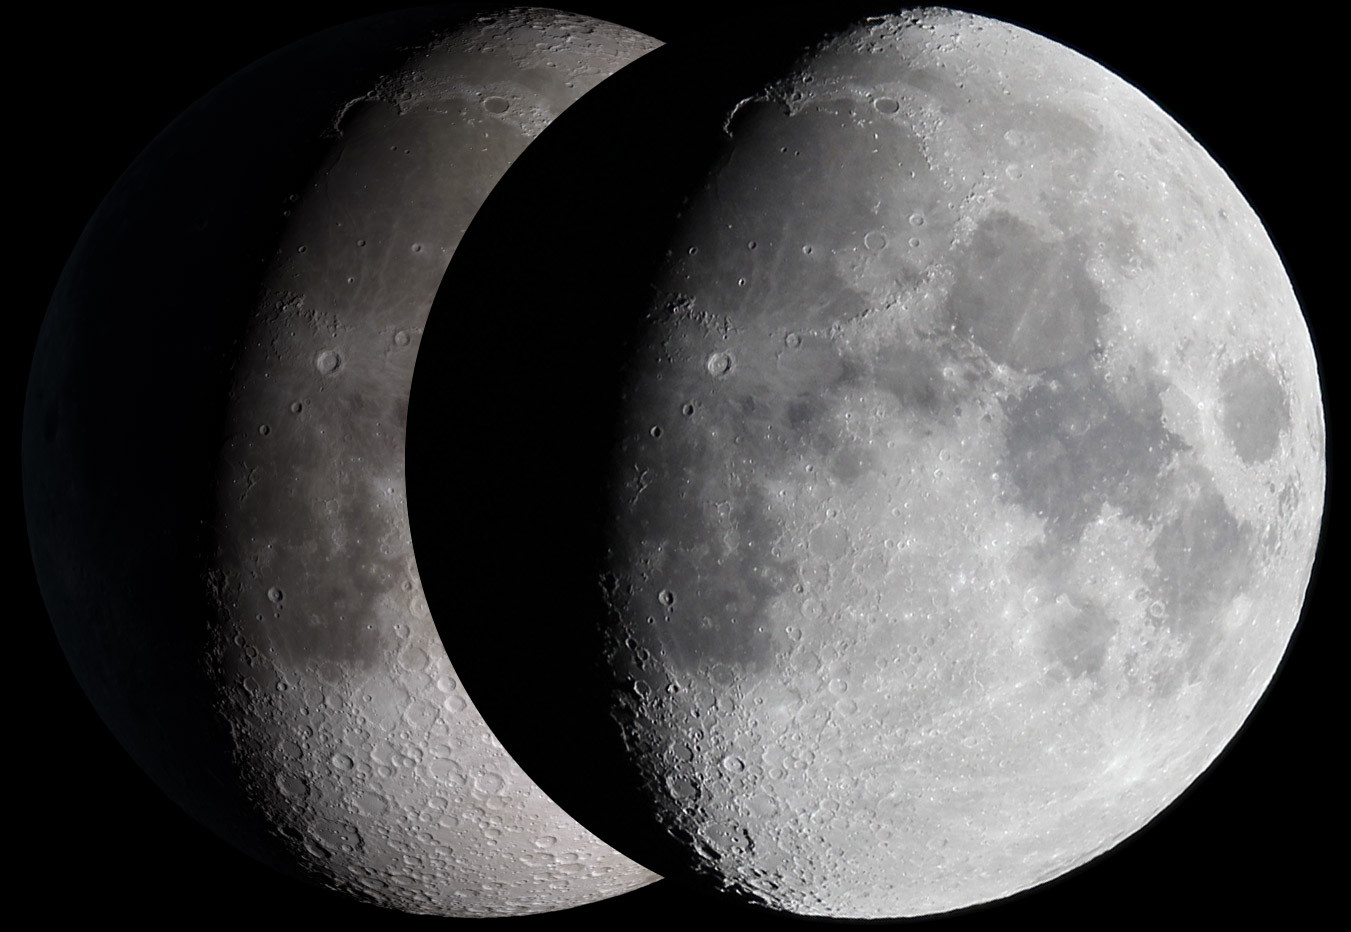
One of my goals is to use photographs of the Moon to verify and improve the lunar visualizations I do for NASA. The following image combines my Moon photo (on the right) with a computer rendering for the same date and time. I've overlapped them in this way because I'm particularly interested in comparing the shadows near the terminator (the day-night line).
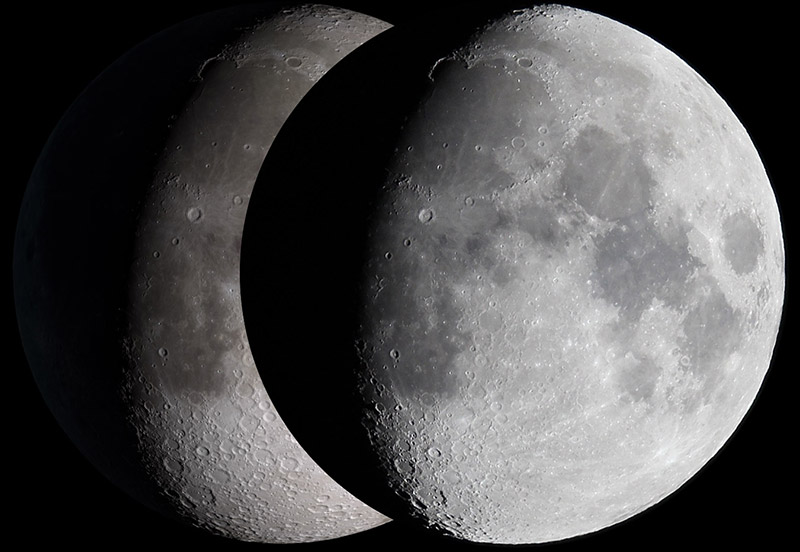 To
embiggen, click here.
To
embiggen, click here.
A couple of weeks later I took my first image of the Sun. This is also the first time I used my laptop to remotely control the camera.
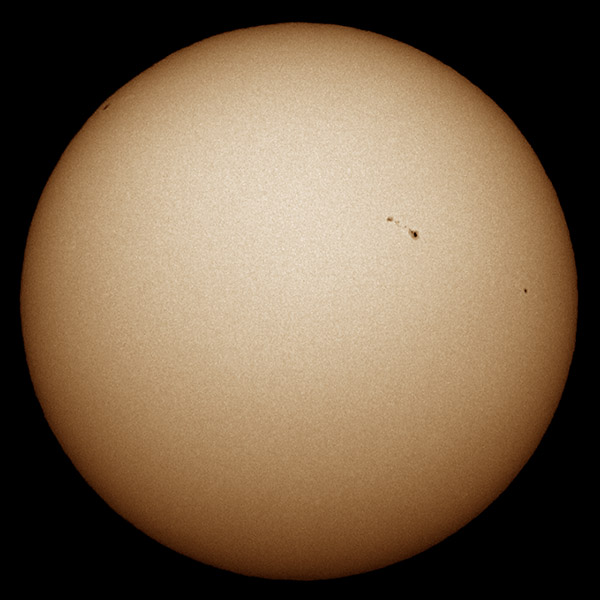 Sun. February 10, 2013
1:30 p.m. EST. 1/2000 sec, ISO 200. Sunspot group #1670 is prominent.
Sun. February 10, 2013
1:30 p.m. EST. 1/2000 sec, ISO 200. Sunspot group #1670 is prominent.
The Sun is a uniquely challenging target. Just getting it into the field of view without using a finder scope is a trick, and it seemed harder with the camera than it is with an eyepiece. The unsteady air that causes bad seeing is at its worst in the direction of the Sun, so you need lots of images with fast shutter speeds in order to capture the lucky moments of undistortion. And the laptop screen isn't easy to see in daylight. I had to create a makeshift hood by throwing a jacket over it.
My solar filter is Baader film in a cardboard cell that
I made. The light it transmits is a sort of fluorescent blue-white. The amber
color of this image is something I added. The graininess in the photo is
mostly real. The Sun is covered by granules,
small cells of hotter,
brighter material bordered by cooler, darker stuff.
In the past, I've taken a few afocal pictures of interesting events, including another image of Jupiter with the Moon, this time in daylight.
 Jupiter and the Moon, November
9, 2004, at about 11:00 a.m. EST
Jupiter and the Moon, November
9, 2004, at about 11:00 a.m. EST
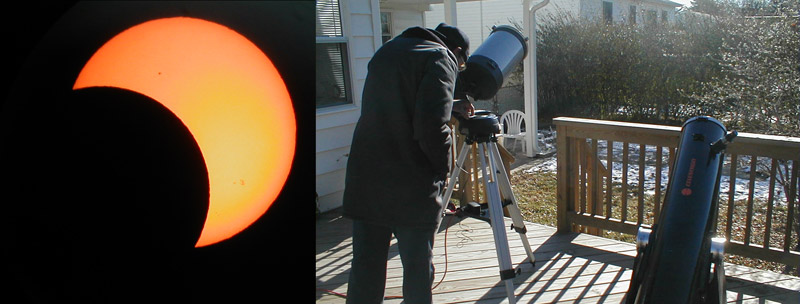 Christmas, 2000 solar eclipse with
my father-in-law, from my back deck
Christmas, 2000 solar eclipse with
my father-in-law, from my back deck
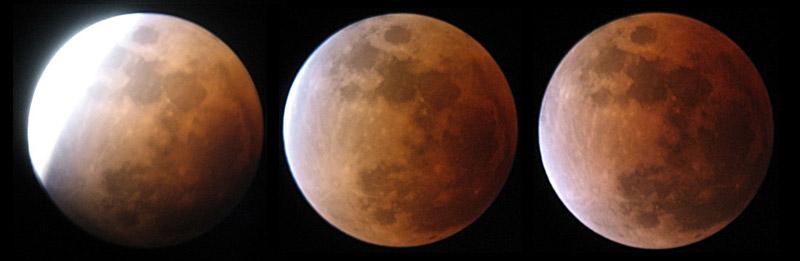 Lunar eclipse of February 20,
2008
Lunar eclipse of February 20,
2008
